In the "Compensation plan engine" / "Configure plans" section you can view, edit and delete existing plans and information on them; and add new plans. You can also go to the page with a list of properties of the plan.
The plan is a detailed description of the criteria and rules for calculating commissions, bonuses and ranks of accounts (distributors) based on marketing activity. Each plan is an isolated entity and has its own properties and rules. Compensation plans usually have different rates of payment for each level of distributors (for example, payment of commissions from 5 to 7 levels in depth). Also, plans may include one or more special bonuses as compensation.
Plan may include the process of calculating the product volume of bonuses to the next suitable distributor at one level, when the distributor in the structure can not claim this bonus. One of the goals of the plan may be to attract a large number of first-line distributors (frontline), and then encourage the distributors of this first line to attract as much as possible to their first line, etc. Some plans offer input bonus - this is the amount that is paid for the first order to a new customer or distributor. These bonuses and other features of the plan, help to adjust the fair distribution of income. This makes the plan more fair to those, who work and produce more than others.
In different plans, different amounts (commissions) are paid at different levels. The right balance between the company and the distributor is the key to the success of a good plan that will ensure a steady and reliable profit.
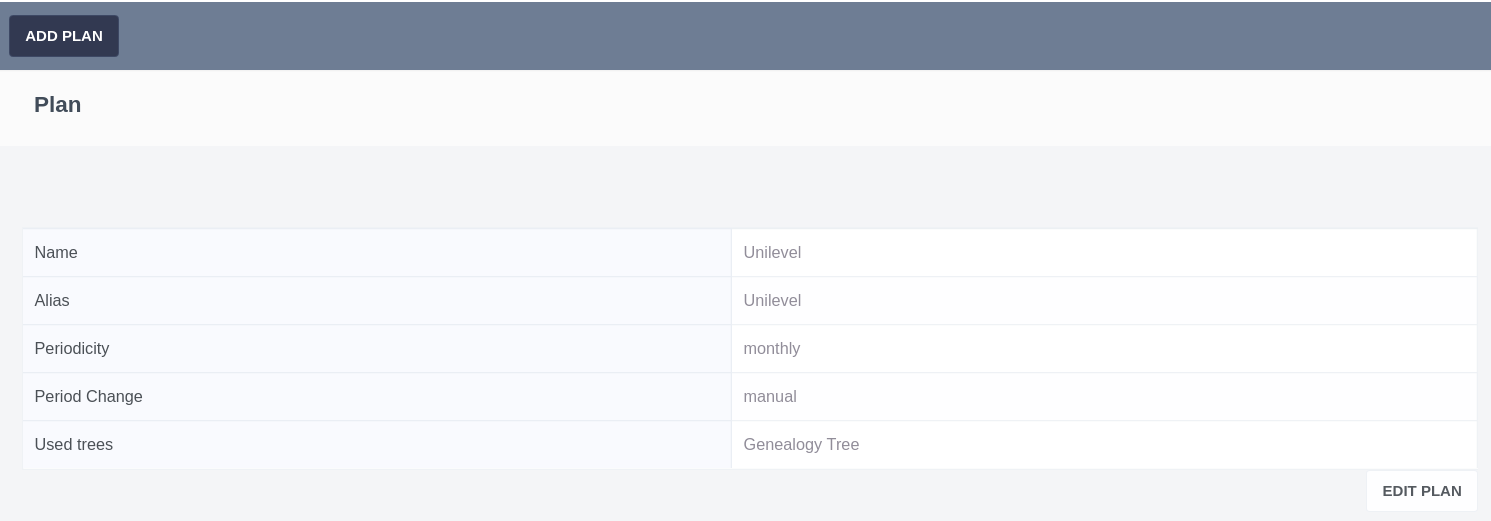
If the plan is singular, then information on it is displayed in the form of a line-by-line list of parameters.
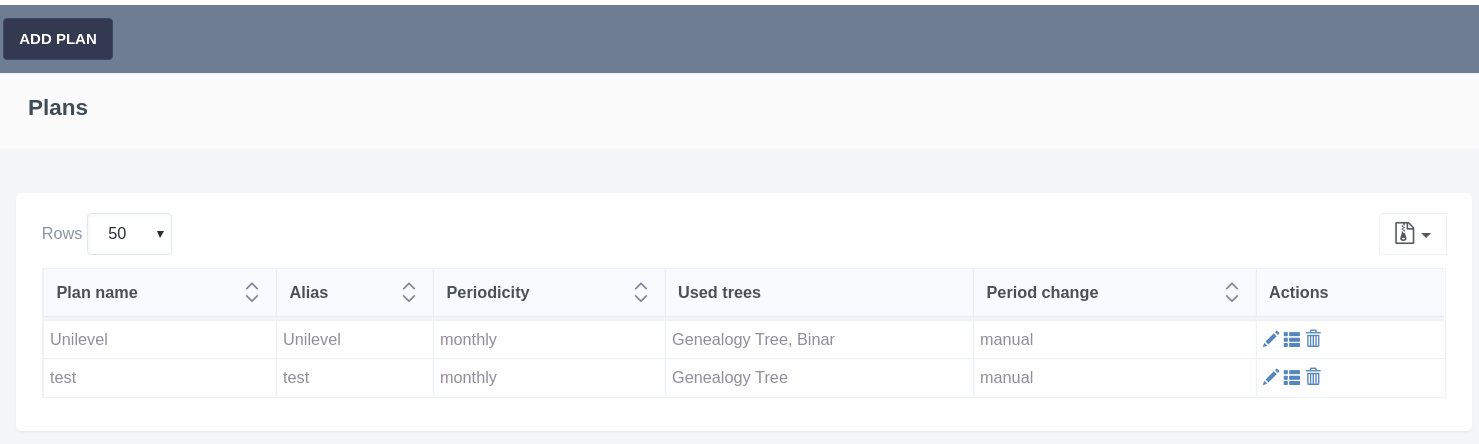
If there are several plans, the plans are placed on the page in the form of a table in which the following information is displayed: Plan name, alias, periodicity, used trees, period change and available actions: Edit, Go to the list of plan properties (see "Plan properties"), Delete.
The export menu is available in the table menu, and the sorting in the columns of the table.
Add new plan
To add new plan, follow these steps:
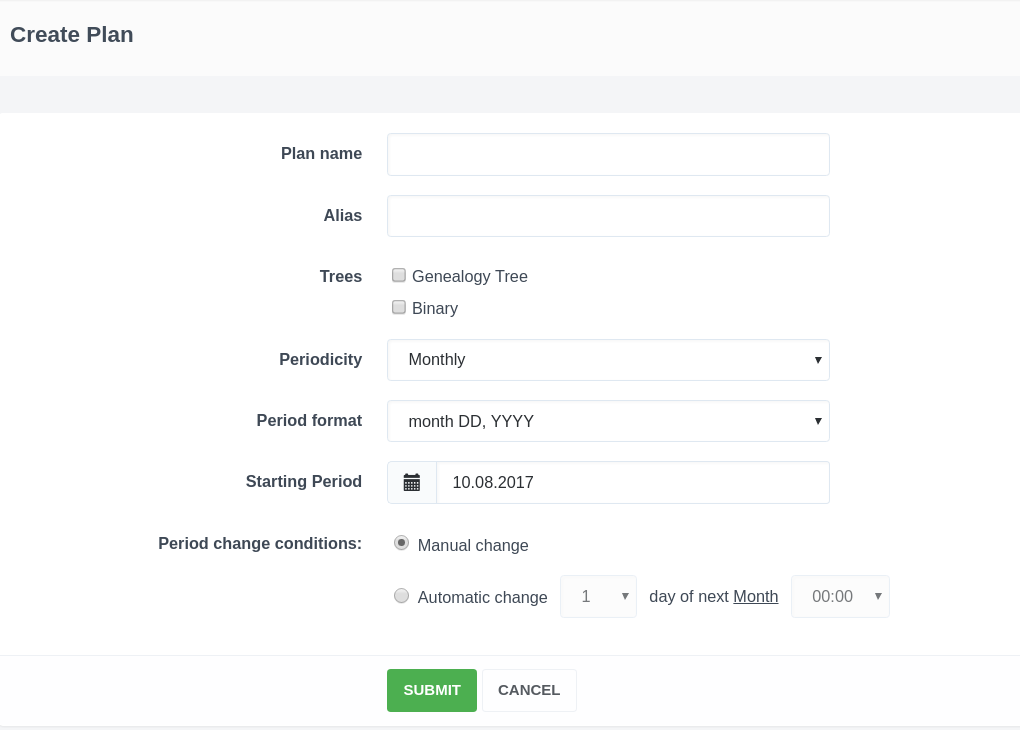
- Click on the blue button "Add plan" located at the top of the page.
- On the plan creation page fill out the fields:
- Plan name - enter the name of the plan you are creating.
- Alias - enter the abbreviated name of the plan.
- Trees - select tree, to which the plan belongs (trees if there is more than one tree in the application). You must select at least one tree. If you need, add new tree in the "Trees" section.
- Periodicity - select the periodicity of the plan's closing(month, week or day).
- Period format - select format for displaying period from the list of available ones.
- Starting period - select the date - the beginning of the period, from the calendar.
- Period change conditions - select and mark one of the two available types of period change:
Manual change - if you want to adjust the period change through manual processes.
Automatic change - if you automatically change the period, you need to select the date and time when the period closes (the form changes, depending on which frequency is selected earlier).
Editing an existing plan
To edit an existing plan, follow these steps:
- Click the "pencil" icon in the "Actions" column in the line of the selected plan (if several plans) / the "Edit plan" button at the bottom of the table (if one plan).
- On the opened prefilled form (the same as creating new plan), edit the plan data.
- Click the "Submit" button and the changes you made will be saved.
Deleting an existing plan
To delete an existing plan, click the "basket" icon in the "Actions" column in the line of the selected plan, if there are several plans (one plan can not be deleted).
Attention! With the deleted plan, all the data associated with it will be deleted!
If you are sure that you want to delete the plan, confirm your actions in the opened window - enter the word "DELETE" and click "Confirm".
Daria T.
Comments