If there's no integration set up between your frontend website, CRM, or any other third-party platform, you may manually import new accounts into the network using this feature.
Here is a step by step instructions:
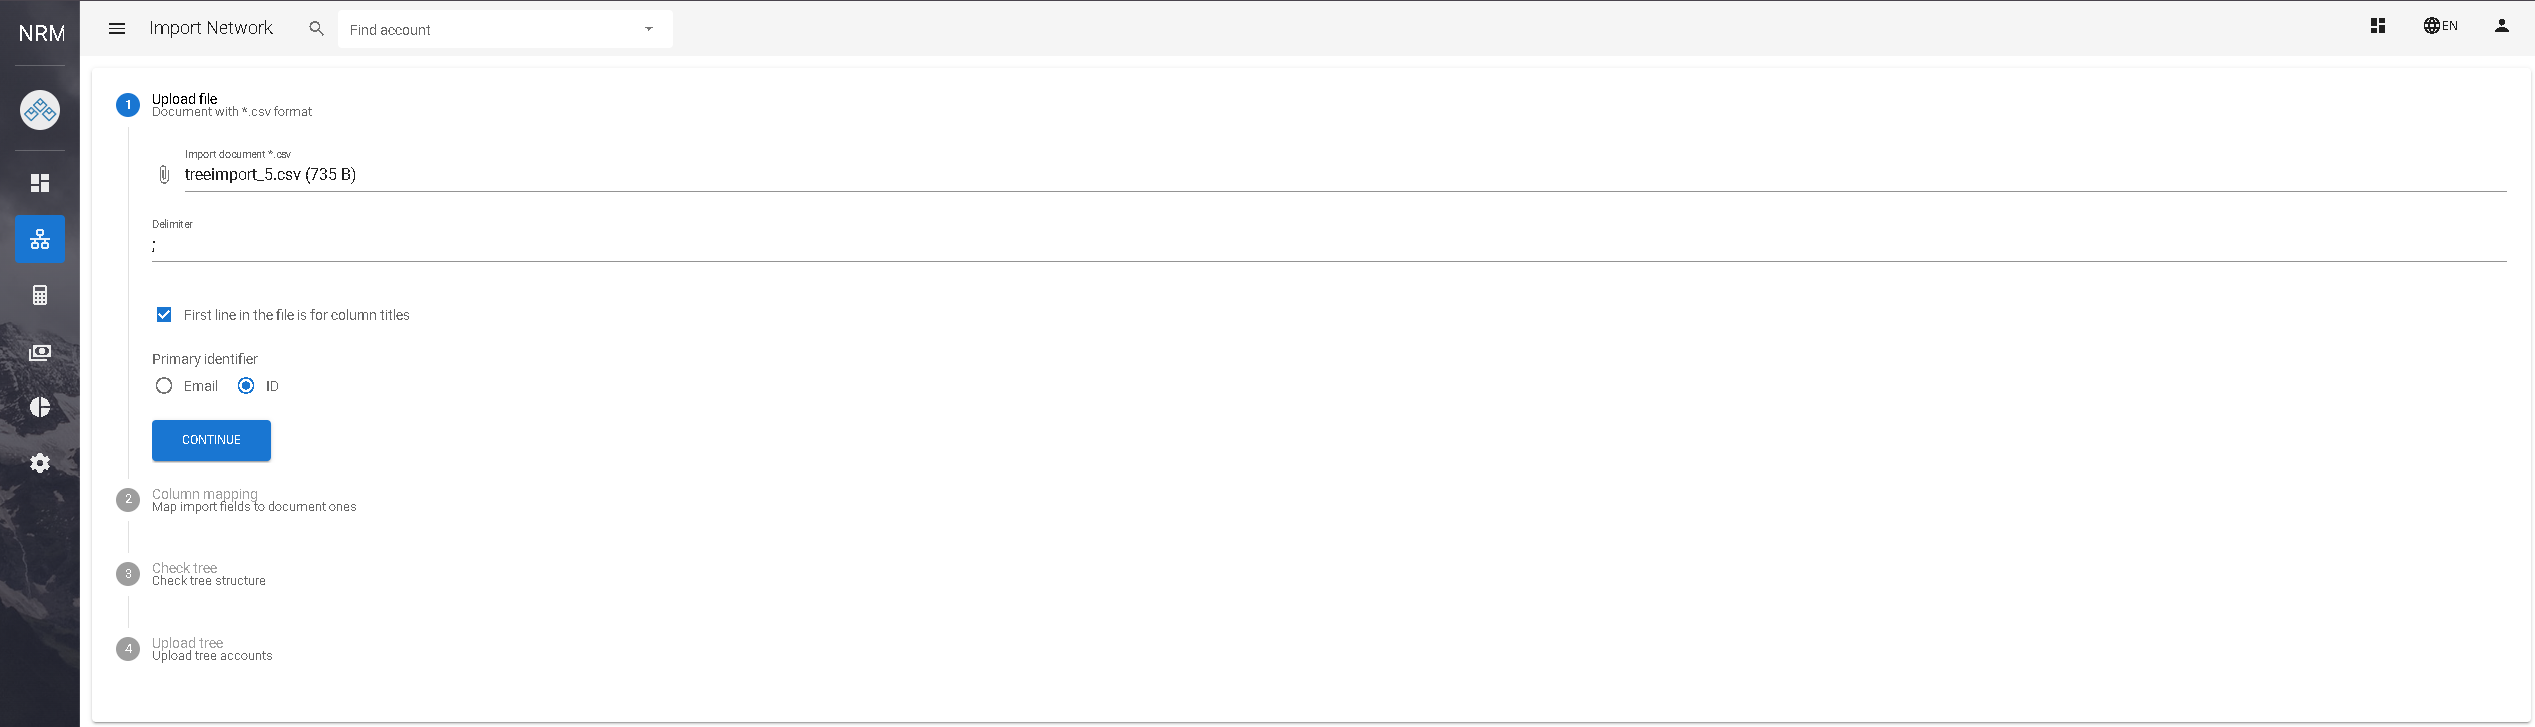
1. Upload file: After entering you Import network tab, you will be brought to this page, select the file you want to upload. Ensure it is in *.csv format.
2. Delimiter: The following setting gives you an option to choose between different characters that will separate the information on the accounts you are importing. In this case, the delimiter is ";"
3. If the document's first line contains the titles about your accounts, select "First line in the file is for column titles "
4. The primary identifier will depend on how you registered your account.
5. Column mapping will pop out where you will have to fill out first 5 field that are required shown below and the rest if needed.

6. Check tree: Verify the tree structure to ensure correct mapping.
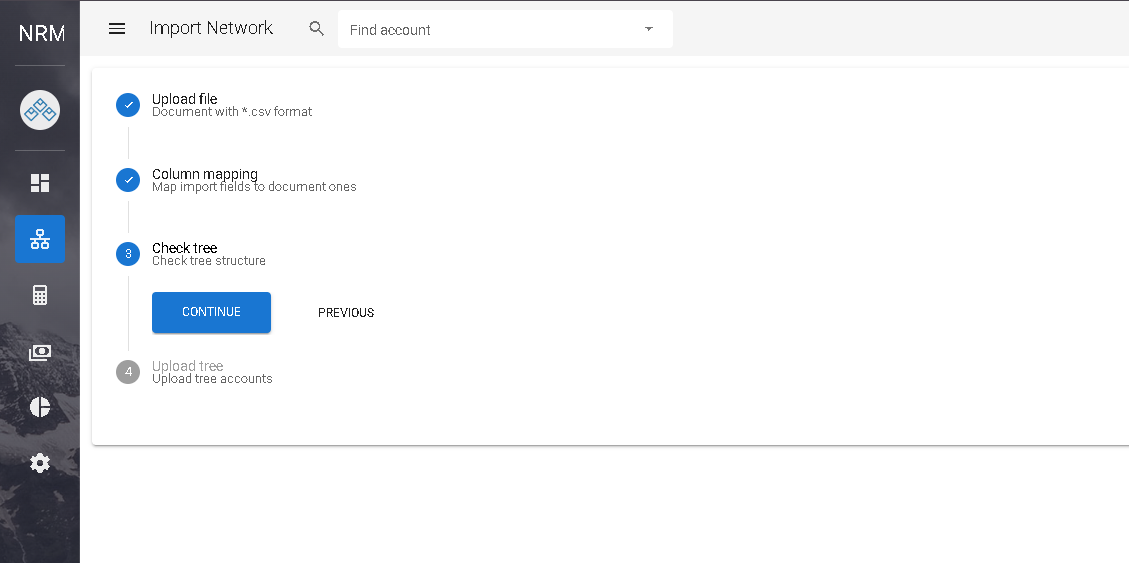
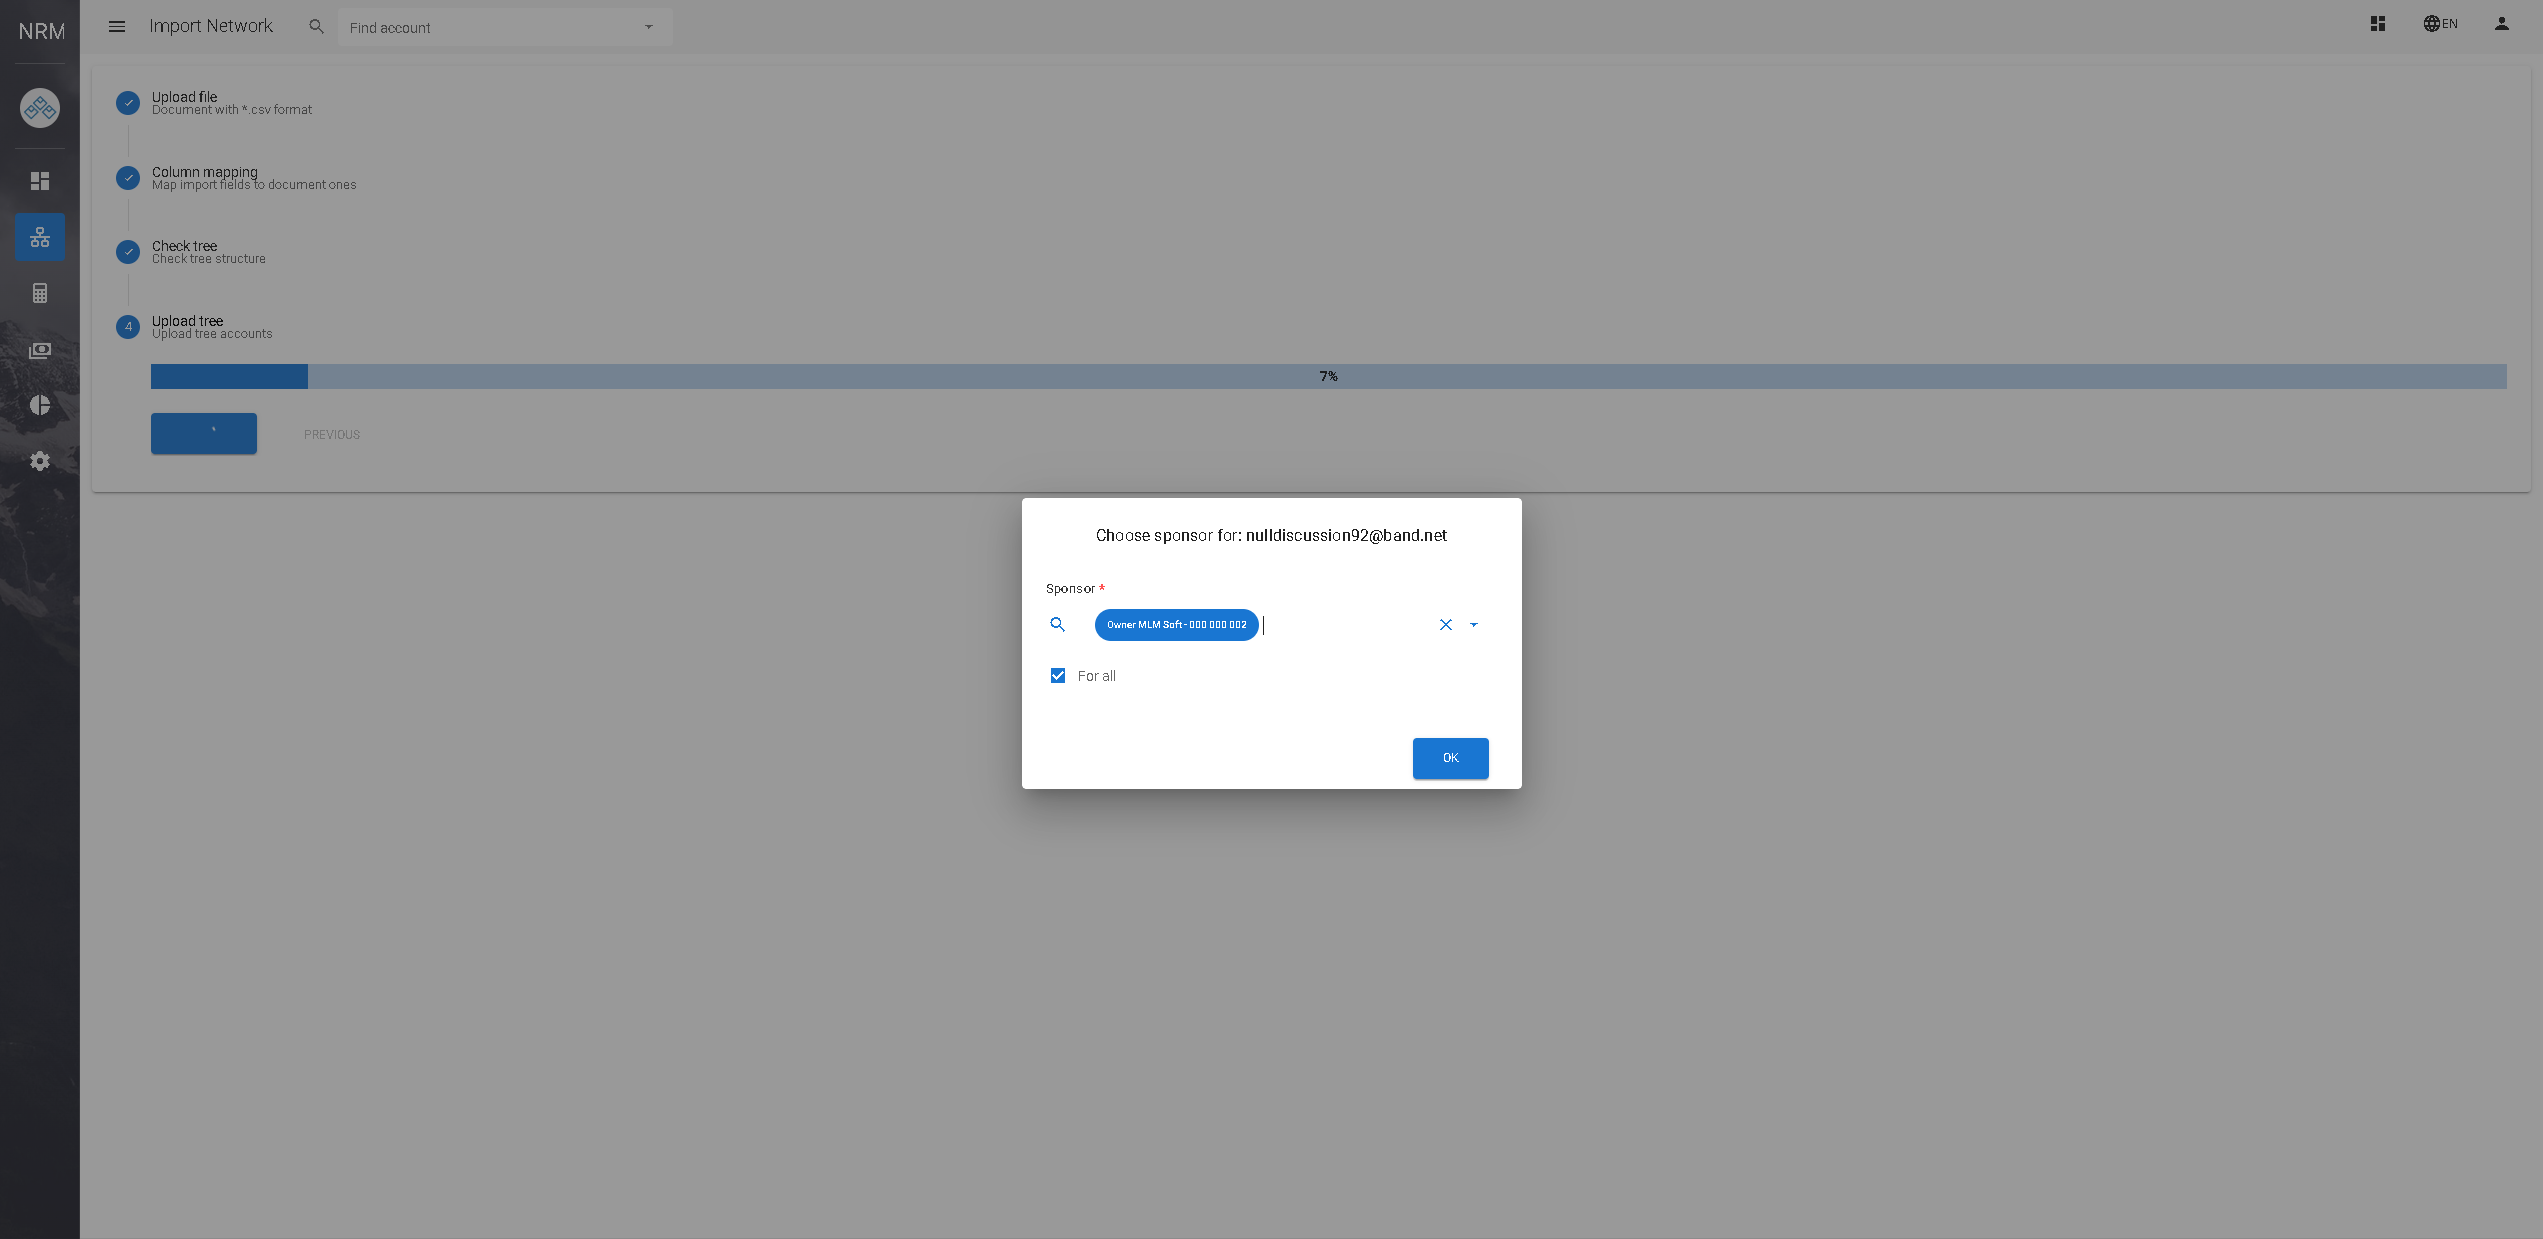
7. Upload tree: Upload the mapped tree accounts.

8. Select your particular sponsor and check "For all"
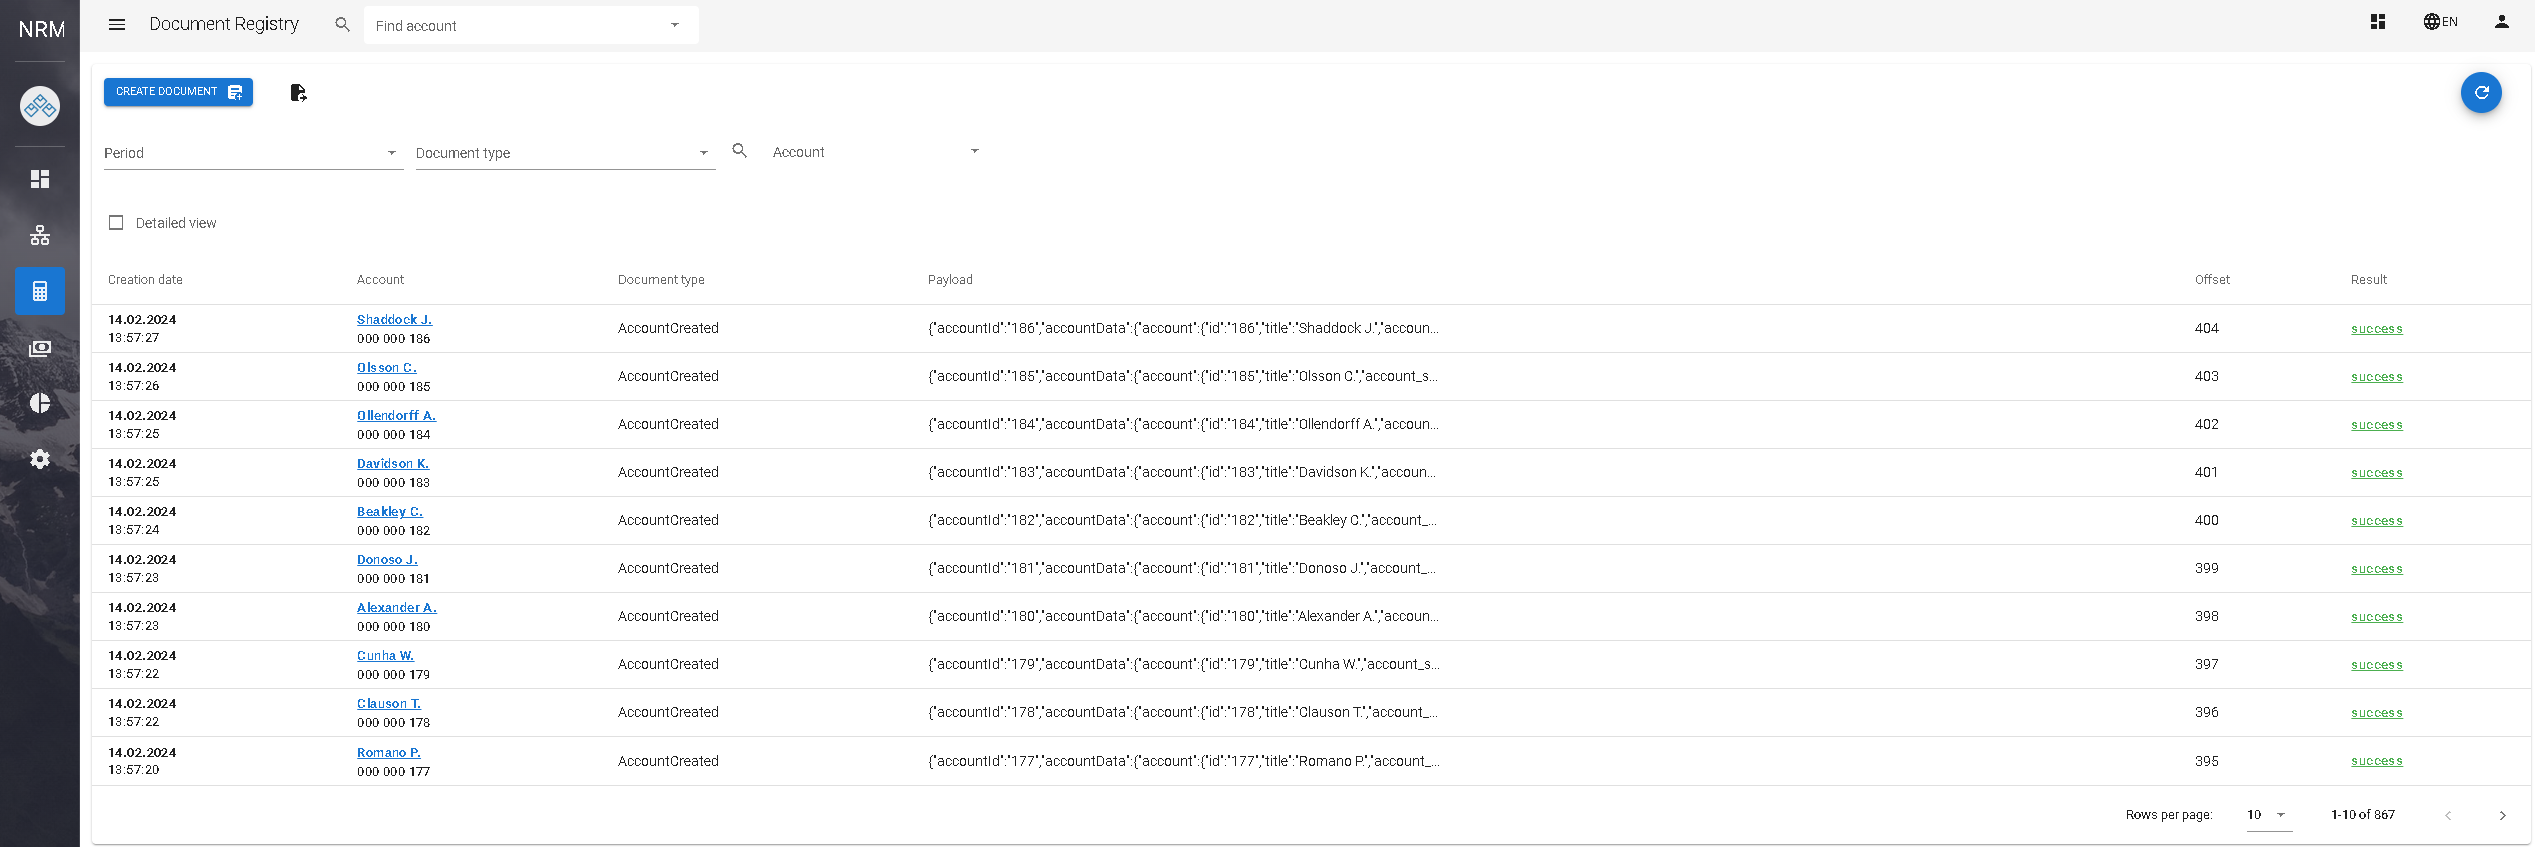
9. After the completed upload, go into your document registry to see the network you have just uploaded
Nikita Clark
Comments